Growing up in Lyon, France, I’ve been fortunate to witness the celebrated “Fête des Lumières” firsthand. This annual celebration transforms the city into a mesmerizing canvas of light, showcasing its streets, landmarks, and buildings as breathtaking works of art. Each year, on December 8th, millions of visitors from around the world gather in Lyon to marvel at this extraordinary event, immersing themselves in a stunning fusion of light, color, and creativity that defines the essence of the Fête des Lumières.
Motivations
Today, I decided to take on a personal challenge: using Houdini, a 3D software, to create and simulate an AI driven light art installation inspired by the “Fête des Lumières.”
My objective was to immerse the visitor at the center of the experience by incorporating an interactive prompt system. This system, powered by generative AI, would dynamically create and project images on buildings based on visitor prompts, ensuring a highly personalized and engaging display.
Handling The AI Side
In this project, we will generate some image from prompts using MLOPS Houdini package. The MLOPS Houdini library integrates machine learning capabilities within the Houdini environment, facilitating AI model deployment and integration into 3D workflows. It enables the seamless interaction between generative AI models and Houdini’s procedural generation tools.
Building Mesh
Now let’s explore how we can create a proof of concept for this whole idea. To begin, we need to find a fitting 3D model for our project. Personally, I decided to use a 3D model of the door from the French medieval church of Sainte-Radegonde in Poitiers. This model is freely available for download here, providing an excellent starting point for our light art installation.
Implementation
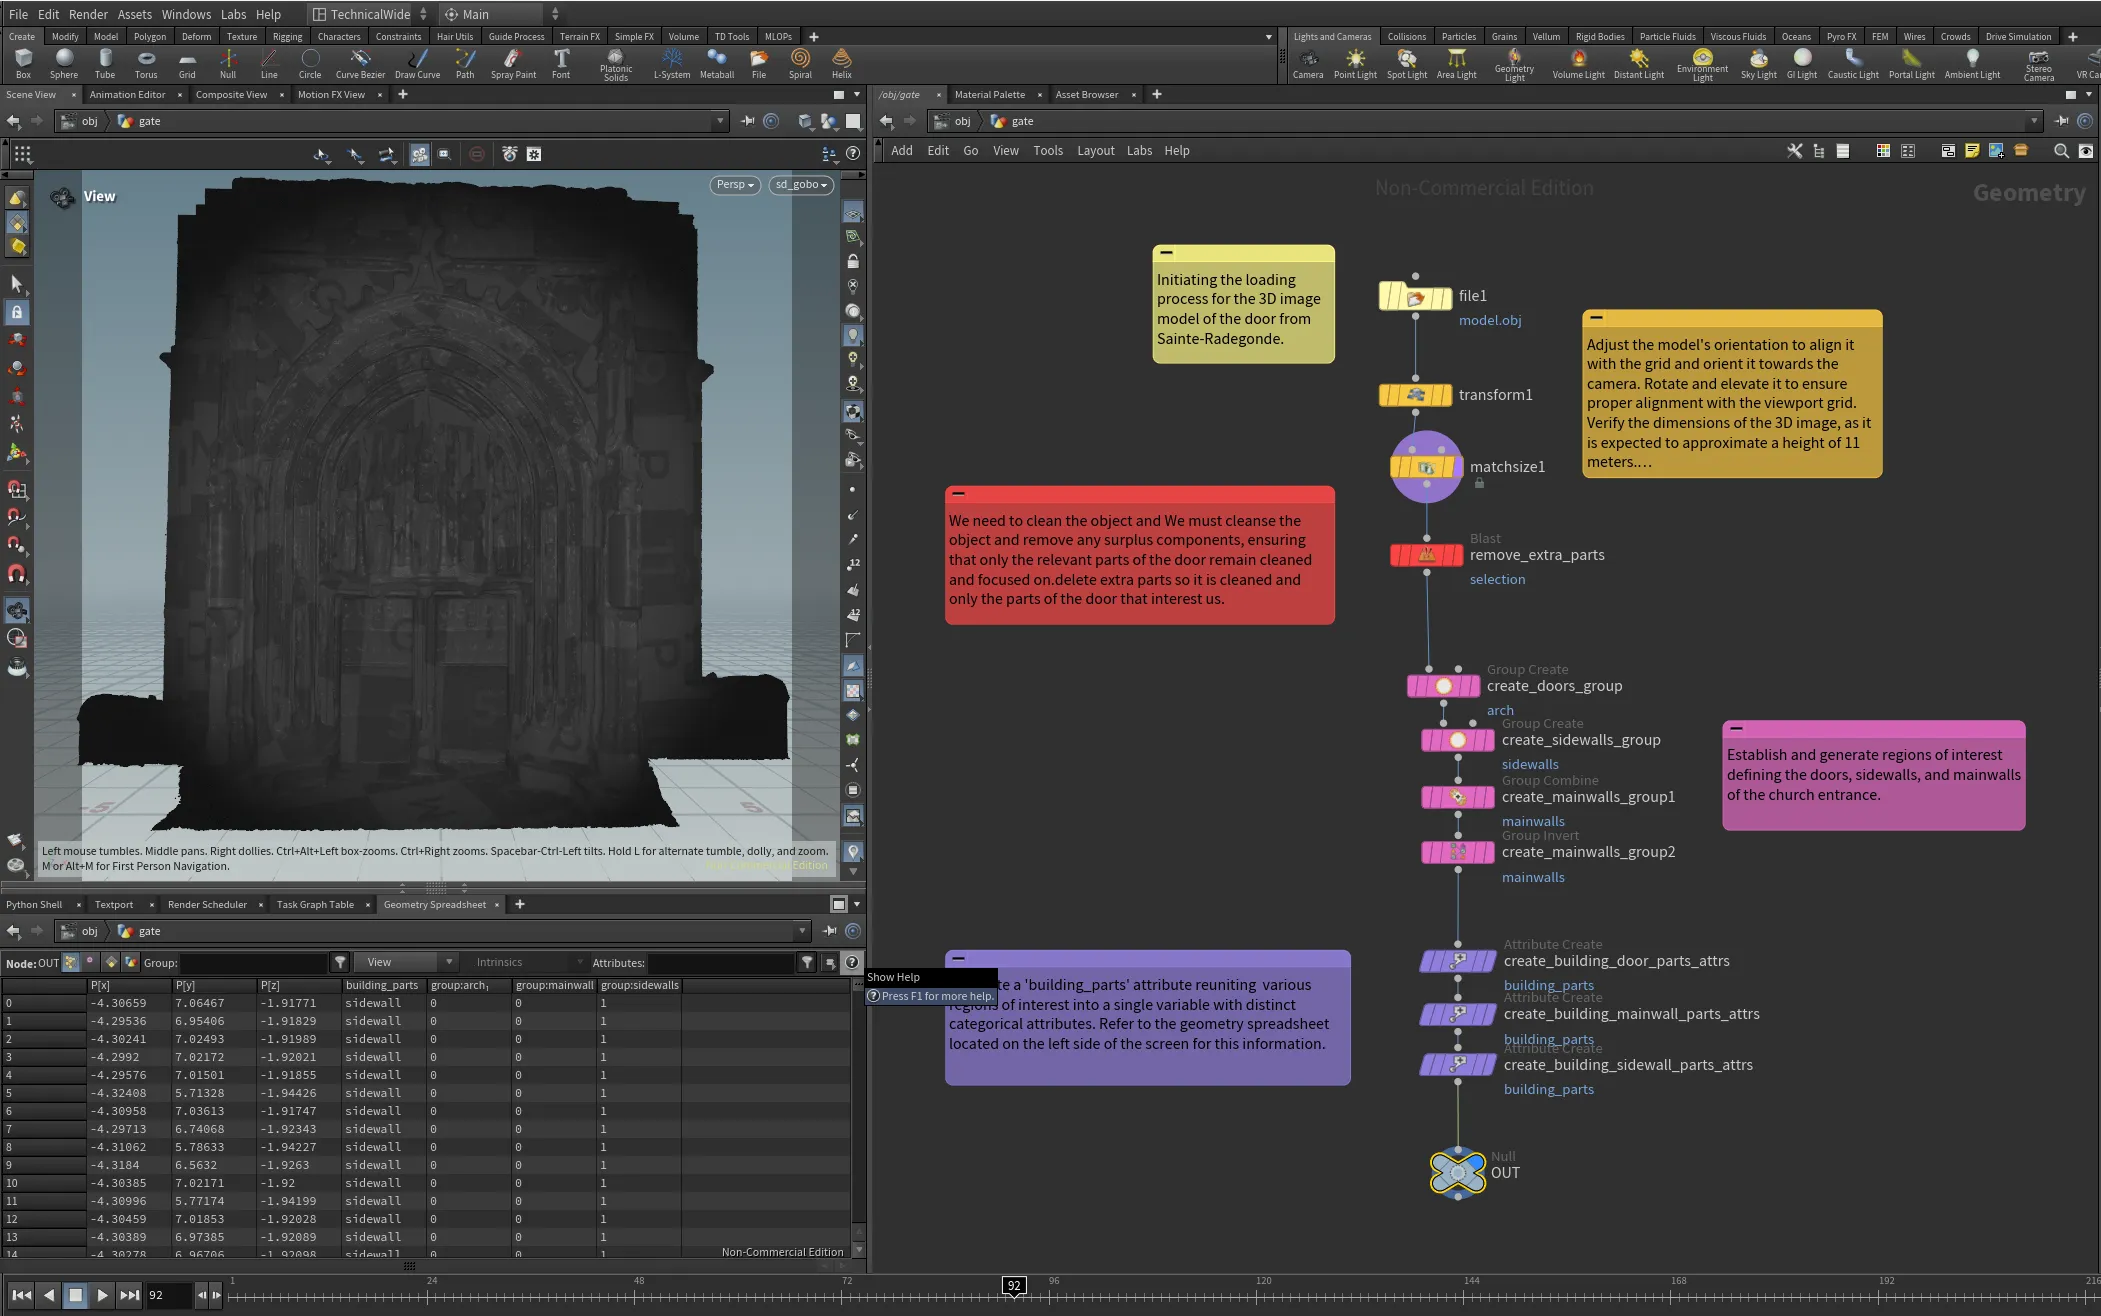
After importing the model into Houdini, the first step is to align it with the viewport grid using a series of transformations. The next step is to split the mesh into Houdini groups. These groups will be used to populate a custom attribute named “building_parts,” which will be essential in the next steps. This attribute will help us create masks, which will be critical when we integrate generative AI-generated layers during the compositing phase of the project.
For this proof of concept, we’ve identified three zones of interest on the 3D model: the main door group (all areas within the arch), the sidewalls (including the two side columns and the main wall), and everything else. This segmentation enables us to focus on specific areas when applying transformations and generating AI-based projections. The mesh handling setup, which organizes these zones, serves as a foundation for the next steps in the process.At that point, our setup that handles the mesh looks like the one below.
Now, we return to Houdini root at the “/obj” level and create a camera and a point light, used as a gobo light to project our image over our mesh. We established the camera resolution at 512x512, which serves as the maximum resolution input image for the stable diffusion 1.5 model we will be using. Once we are done setting up our setup, our “/obj” level looks like this.
As illustrated in the preceding screenshot, a critical procedure involved configuring the camera settings to attain consistent viewpoints between the camera and the gobo-equipped point light. This alignment is essential because we want the image projected from the gobo to match what has been captured by the camera.
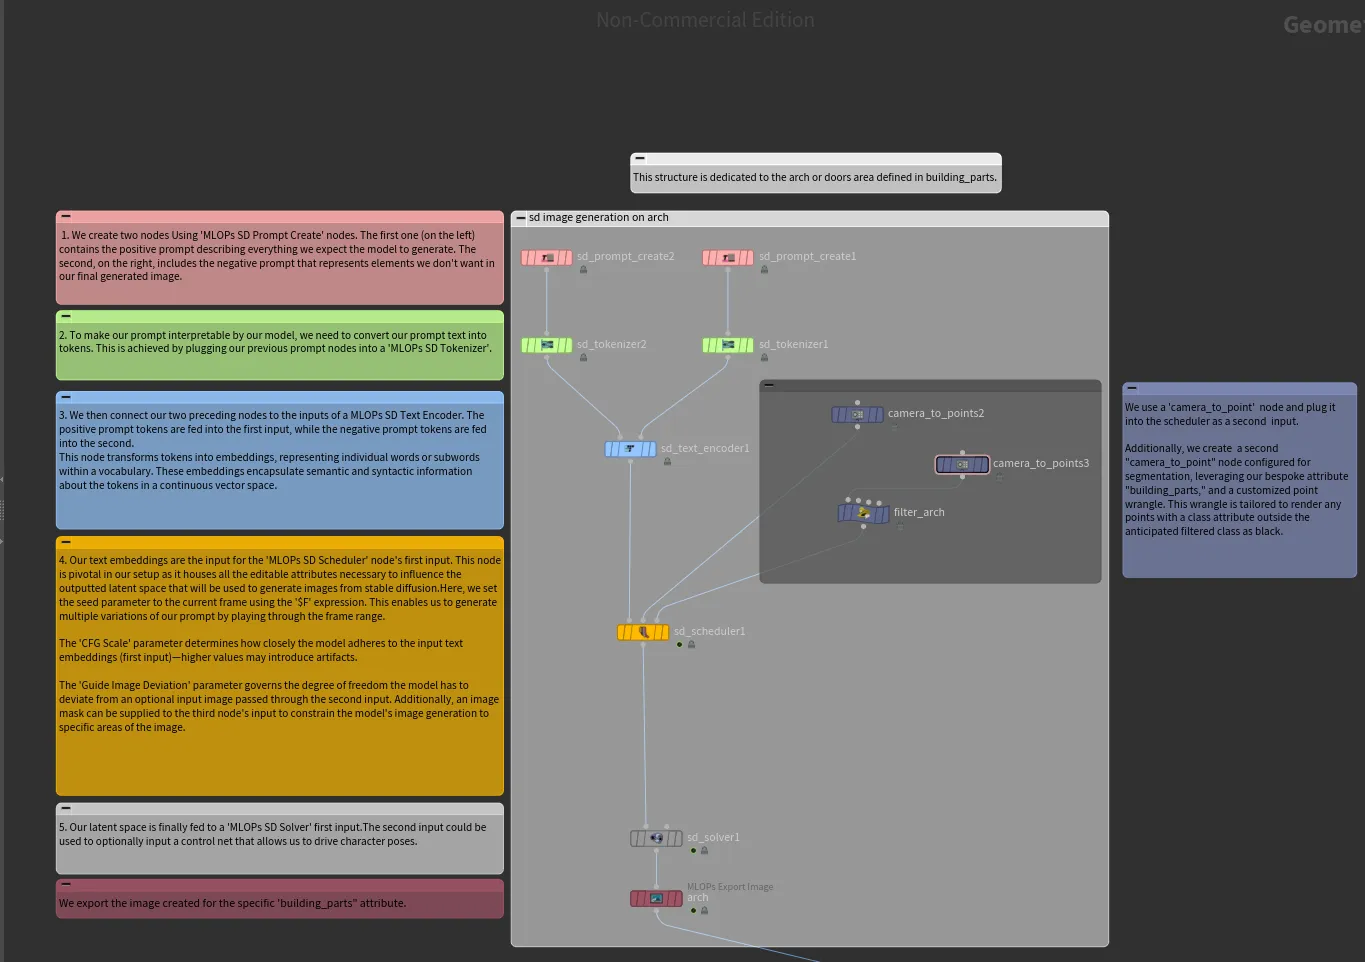
Now, let’s explore the generative AI step further. Within our “/obj/sd” node containing our MLOPS setup, we’ll create three separate graphs, each tasked with generating an image for a specific part of the segmented mesh using the custom attribute “building_parts” we established earlier. This segmentation enables us to tailor the generative AI process to each distinct area of interest in the scene, ensuring precise and targeted image generation.
This means we use the same design to build three different prompt and model architectures for the doors or arch, the mainwall, and the sidewalls. Below is the design explained for the door area. I won’t go into too much detail about MLOps here, as I’ve already taken the time to comment on each part of the MLOps setup in the screenshot. If you’re curious about the function of each node, you can refer to those comments for a clearer understanding of what’s happening at each step.
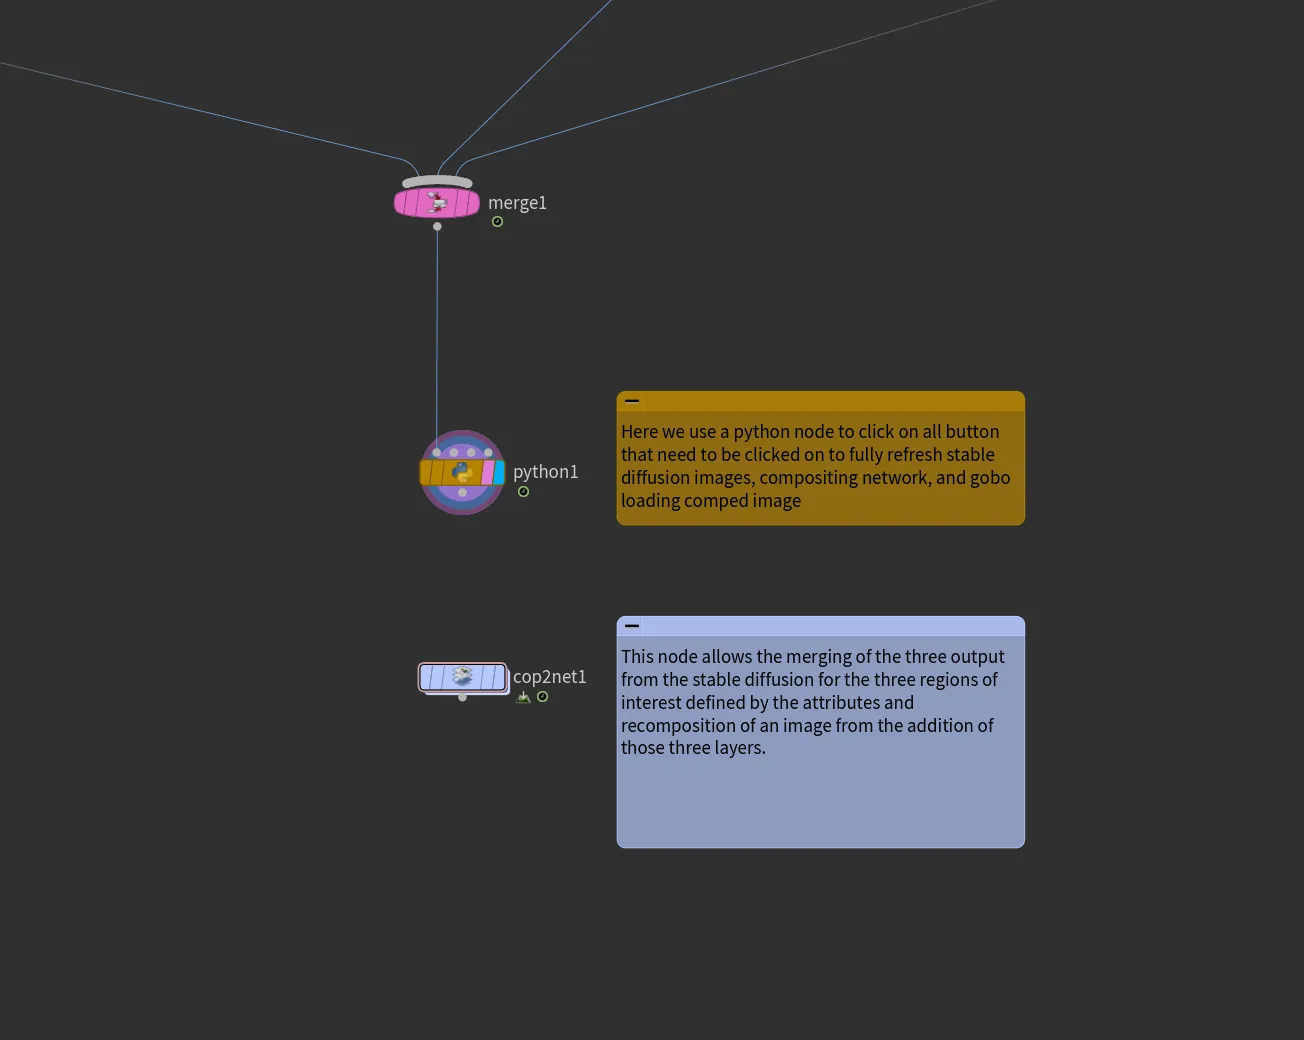
We connect all of those branches back using a merge node and connect this later one to a Python SOP node. This Python node will refresh the loading of the COP nodes, which will load the generated AI image residing within the “cop2net” node below. Once each branch has finished generating an image, this refresh triggers an update in the compositing process, consequently updating the projected image at the gobo level. This linkage is dynamic, as it’s directly associated with our “cop2net” node’s final output node.
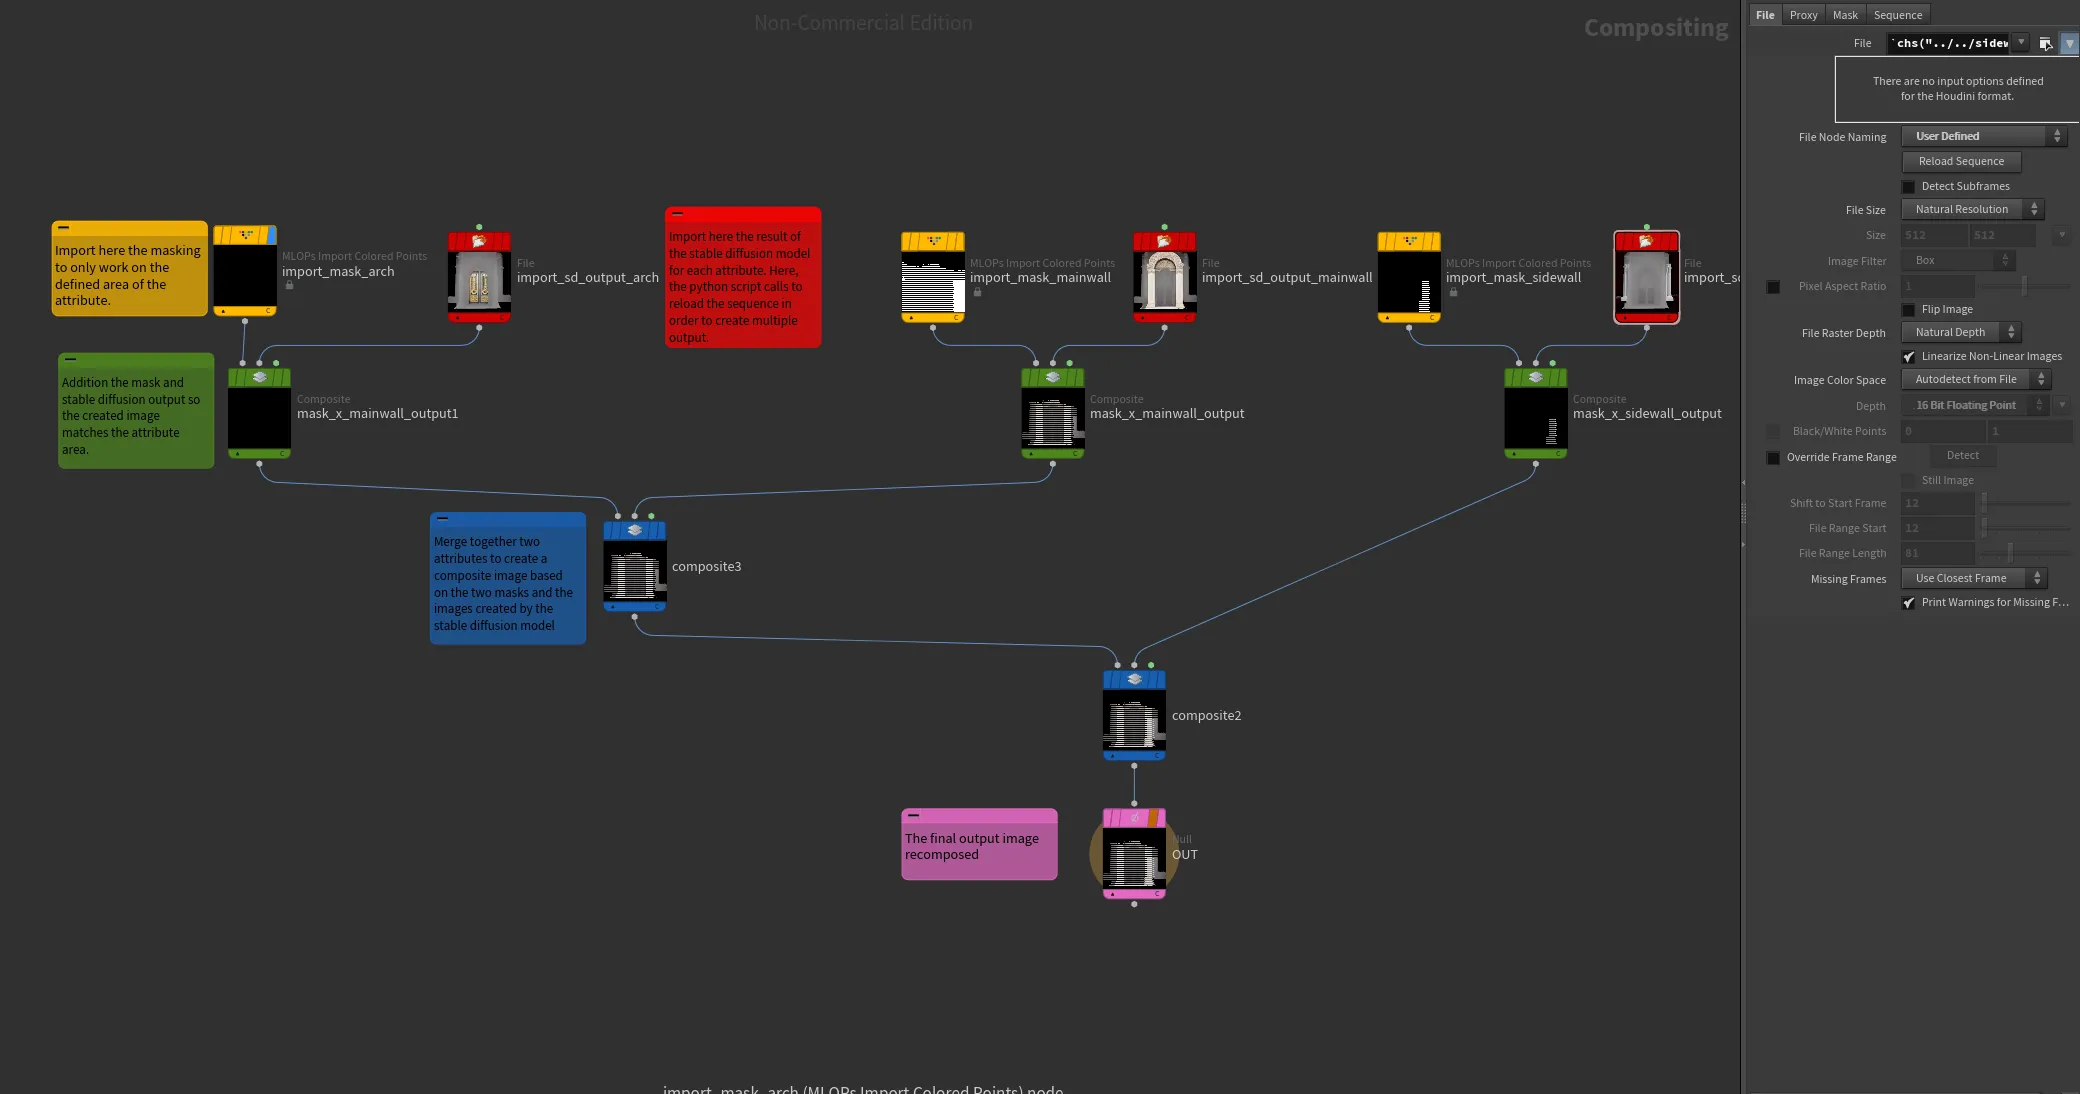
Here is how our cop2net node looks like, showing the different stages of implementation of the stable diffusion images and the masks from the attributes into composite images which leads to the final output image.

AI Generated Images From Stable Diffusion
From the captured image in Houdini's camera, I generated a few door images to be projected onto the mesh. Some of the results show more significant deviations in shape compared to the original door mesh. By tweaking parameters that control the model's flexibility to deviate from the prompt and the building mesh image, I was able to fine-tune the results. This customization allows for variations in how the AI-generated imagery aligns with both the scene and the desired design concept.
Testing Everything
To finalize, we configure the gobo light’s “Projection Map” parameter to dynamically pull the image directly from the cop2net1 node using the expression “op:/obj/sd/cop2net1/OUT/”. This setup enables a procedural flow of the camera gobo map input, removing the need to bake anything.
We also enable the viewport’s high-quality lighting option (the bulb button on the left) and select “Show All Objects” from the top viewport button options. This ensures we can accurately preview the scene’s lighting and overall appearance in real-time feedback. Using this approach ensures a seamless workflow, allowing for continuous iteration without the need to render after each adjustment.
After completing the previous steps, the gobo map projection should now be visible over your mesh within the viewport.
Final Thoughts
In this article, we demonstrated how to project AI-generated gobo maps onto a 3D building mesh. The key advantage of the described workflow lies in its ability to efficiently test and iterate on customizations and optimizations directly from a computer, offering significant time savings compared to configuring and adjusting similar setups onsite.
For refinement, upgrading to Stable Diffusion 3 (compared to the Stable Diffusion 1.5 model used here) could enhance image quality significantly. Additionally, while segmenting images into parts offers greater control, it introduces challenges like inconsistencies when stitching AI-generated sections back together. For quicker setups without requiring this extra control, providing the full image without part separation may be more practical, as it avoids the complexity of realigning mismatched elements. This approach streamlines the workflow while maintaining reasonable output quality.
In a real-world application, achieving this setup would require integrating a camera mounted on a projector, along with a companion tablet or mobile app to facilitate interaction. However, exploring the details of such an implementation will be the focus of a potential future article.
Results

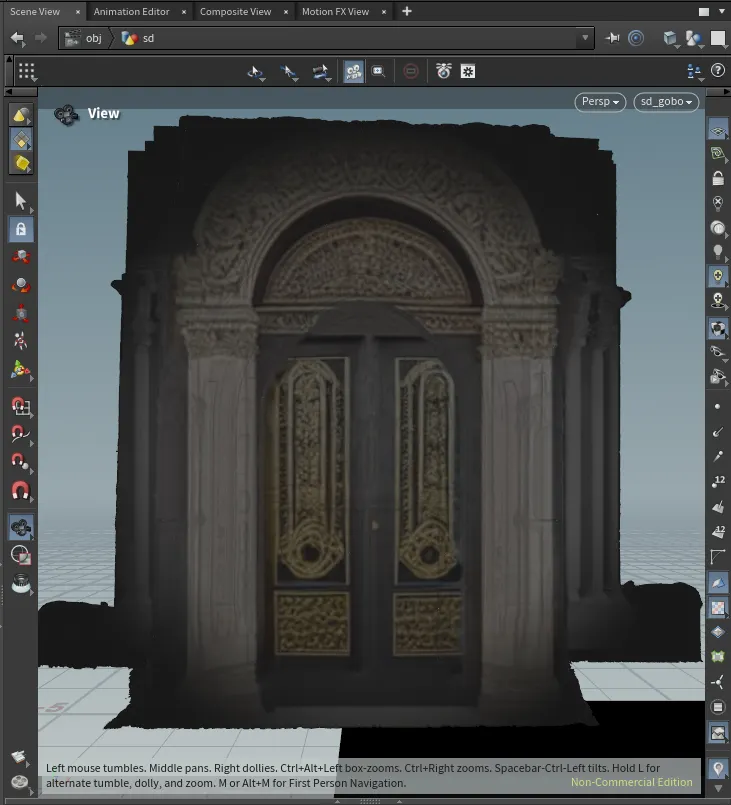
Viewport Preview
Prompt: "An intricately detailed Roman-style door, set in a classical stone archway flanked by columns adorned with Roman carvings. The surrounding architecture is inspired by ancient Roman temples, with ornate stonework and decorative reliefs."

Mantra Render
Prompt: "An intricately detailed Roman-style door, set in a classical stone archway flanked by columns adorned with Roman carvings. The surrounding architecture is inspired by ancient Roman temples, with ornate stonework and decorative reliefs."
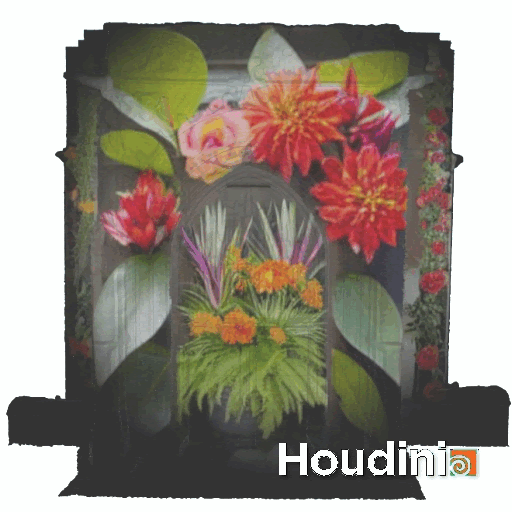
Viewport Preview
Prompt: “luxurious and vibrant tropical forest plants with vivid colored flowers, very detailed and lots of red, orange, greens”